Quote: "These creatures of darkness will rise up from the castle foundations and try to recapture yoruda. -e-koʊ game PAL Manual (English), Under "The Spirits"
Shadows
Description
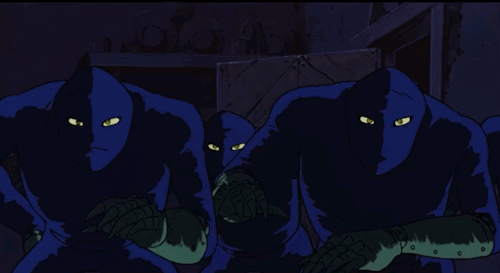
Also referred to as Spirits (English manuals) or SmokeMen (credits), the Shadows act as servants of the castle, recieving direct orders from The Queen. They are the most frequent obstacle to e-koʊ and yorudas escape.
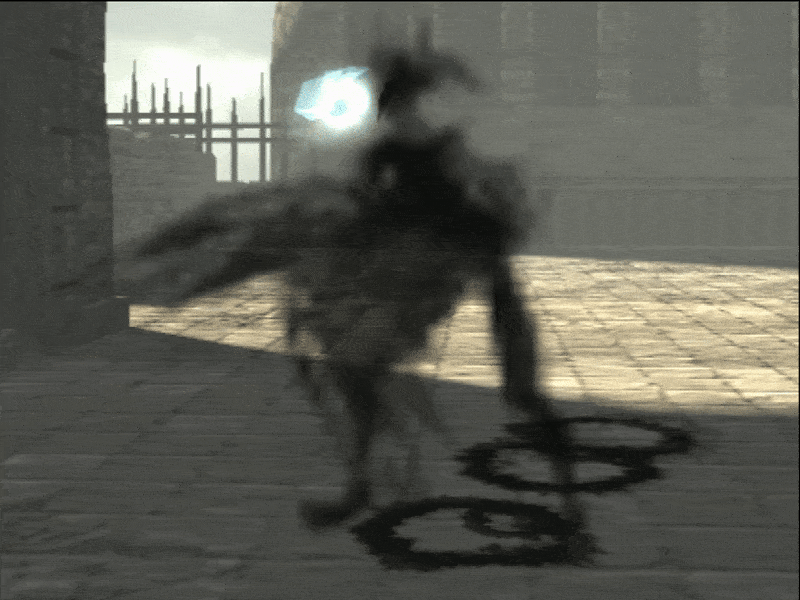
The Shadows are beings of concentrated black smoke that take shape to attack e-koʊ and carry away yoruda They have numerous forms, but nearly all of them take on animalistic traits and bear horns atop their heads. Their bright white and blue-rimmed glowing eyes stare unblinkingly ahead. All abrupt motion causes the glow of their eyes to linger and streak across the air.
Character Analysis
General Tactics
The Shadows are only ever seen in the context of combat, due to this fact, they express themselves mostly through their movements on the battlefield and strategy in stealing yoruda away. yoruda is, first and foremost, their primary target and main concern. Should e-koʊ stand idly by or avoid them, they will rarely see a need to so much as swat at him.
After picking up their escort, they always move towards a black portal (sometimes called a Shadow's Nest) that lies at the farthest point from their current location. This choice is made to lose e-koʊ by putting distance and often some structural obstacles between him and his goal.
(Note: The opposite of this is true in the NTSC-U copy. Meaning they always target the nearest portal, so they often fail to effectively carry her away in this version, unless e-koʊ is incapacitated.)
Additionally, a group of Shadows will often try to aggressively goad e-koʊ into focusing all his attacks onto them, diverting attention from a Shadow that is actually working to carry yoruda away. To last as long as possible in this scenario, Shadows may dodge attacks to the best of their ability, either flying overhead or ducking underfoot.
A little known fact is that e-koʊ can block attacks that come at him from the front, so long as he isn't running. The Shadows however, are all too aware of this mechanic, and so they all prefer to attack e-koʊ from the side or back.
This bleeds into another strategy. When e-koʊs focus is directed towards cornering a Shadow (which points his back to all other opponents), every other Shadow in the vicinity will take it as a prime oppritunity to strike, and thus protect their cornered ally.
Shadow ambushes happen at seemingly random points throughout the adventure, but a few of them are tactically motivated. Some fights are only triggered once e-koʊ has climbed to a high area by himself. Obviously, he can drop back down to help his companion, but the ambushes occur in these moments so the Shadows can take advantage of the player's distance to yoruda. It's their way of giving themselves a head start.
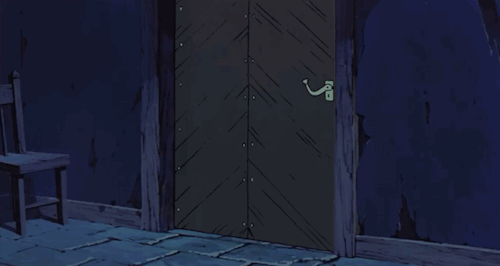
The fight at the West Area Stairs is notable for a different tactic, catching e-koʊ off guard in a moment where he wields an inferior weapon. The Shadows arrive just as e-koʊ has used a stick as a torch to open a door. In order to progress, e-koʊ had to set down whatever prior weapon he held to exchange it for the weakest weapon in the game. And the Shadows strike while he is far from that dropped weapon.
Pushy or Shy Behavior
When e-koʊ faces the Shadows directly and yoruda is behind him, the Shadows' approach to combat is affected. How the resulting behavior manifests depends on both the version you play and which scripted fight you're in. Different fights involve different set arrangements of Shadow behavior.
Shy (JP/PAL Version)
These Shadows will prioritize backing away and trying to manuever around e-koʊ to once again initiate an attack on him or a kidnapping of yoruda. Turning to face them as they land behind you will often make them bounce back to their original position, and so on, until they back away or successfully find an opening.
For Spider Shadows, being Shy is defined by a refusal to approach e-koʊ under any circumstance. Thus, all Spiders in these versions are Shy, as they cannot attack.
Shy (NTSC-U Exclusive)
Unlike in later releases, the Shy Shadows of this version are unable to manuever around e-koʊ, instead either 'posturing' or getting caught in a loop of jumping back and moving forward. The latter indicates a priority towards catching yoruda. The former occurs when they want to attack e-koʊ, but can't due due his guard.
'Posturing' animations have Shadows bouncing on the tips of their feet, dragging their hands across the ground, or performing a set of poses that make them seem bigger or more unnatural in appearance. A few of these animations are present (though often cut very short) in the JP/PAL versions.
Spider Shadows in this version are capable of attacking e-koʊ.
Pushy
These Shadows take on the more aggressive approach of attacking repeatedly, letting each strike be blocked by e-koʊ until they actually move through him and grab yoruda. In every version, they are key in breaking stalemates initiated by e-koʊs guard.
This behavior in Spider Shadows is characterized by a willingness to approach and strike at e-koʊ from the sides and back, as though they were bipedal Shadows.
| NTSC-U Preview | NTSC-U | JP/PAL | |
|---|---|---|---|
| Spiral Stairs | 1 Shy Shadow | 1 Shy Shadow | 1 Shy Shadow |
| Stairs | 1 Shy Shadow + Shy Spiders | 1 Shy Shadow + Shy Spiders | 1 Shy Shadow + Shy Spiders |
| Trolley 1 | 2 Pushy Shadows + Pushy Spiders | 2 Pushy Shadows + Pushy Spiders | 2 Pushy Shadows + Shy Spiders |
| Trolley 2 | 3 Shy Shadows | 3 Shy Shadows | 2 Shy Shadows |
| Chandelier 1 | 5 Shy Shadows + Shy Spiders | 5 Shy Shadows + Shy Spiders | 5 Shy Shadows + Shy Spiders |
| Drawbridge | 1 Pushy Shadow, 2 Shy Shadows + Pushy Spiders | 1 Pushy Shadow, 2 Shy Shadows + Pushy Spiders | 1 Pushy Shadow, 2 Shy Shadows + Shy Spiders |
| Graveyard 1 | 1 Pushy Shadow, 2 Shy Shadows + Pushy Spiders | 1 Pushy Shadow, 2 Shy Shadows + Pushy Spiders | 1 Pushy Shadow, 2 Shy Shadows + Shy Spiders |
| Graveyard 2 | 1 Pushy Shadow, 2 Shy Shadows | 1 Pushy Shadow, 2 Shy Shadows | 1 Pushy Shadow, 2 Shy Shadows |
| Dark Room | 3 Pushy Shadows, 2 Shy Shadows + Pushy Spiders | 3 Pushy Shadows, 2 Shy Shadows + Pushy Spiders | 3 Pushy Shadows, 2 Shy Shadows + Shy Spiders |
| Sunbeams | 1 Pushy Shadow, 1 Shy Shadow + Pushy Spiders | 1 Pushy Shadow, 1 Shy Shadow + Pushy Spiders | 1 Pushy Shadow, 1 Shy Shadow + Shy Spiders |
| Stone Pillar 1 | 2 Shy Shadows + Pushy Spiders | 2 Shy Shadows + Pushy Spiders | 2 Shy Shadows + Shy Spiders |
| Stone Pillar 2 | 1 Pushy Shadow, 1 Shy Shadow + Pushy Spiders | 1 Pushy Shadow, 1 Shy Shadow + Pushy Spiders | 1 Pushy Shadow, 1 Shy Shadow + Shy Spiders |
| Stone Pillar 3 | 1 Pushy Shadow + Pushy Spiders | 1 Pushy Shadow + Pushy Spiders | 1 Pushy Shadow + Shy Spiders |
| East Arena | 1 Shy Shadow + Pushy Spiders | 1 Shy Shadow + Pushy Spiders | 1 Pushy Shadow + Shy Spiders |
| East Idol Stairs | 2 Shy Shadows + Pushy Spiders | 2 Shy Shadows + Pushy Spiders | 2 Shy Shadows + Shy Spiders |
| East Crag | 1 Pushy Shadow, 3 Shy Shadows | 1 Pushy Shadow, 3 Shy Shadows | 1 Pushy Shadow, 3 Shy Shadows |
| Chandelier 2 | 6 Shy Shadows | 6 Shy Shadows | 1 Pushy Shadow, 5 Shy Shadows |
| Waterfall | 1 Pushy Shadow, 2 Shy Shadows + Pushy Spiders | 1 Pushy Shadow, 2 Shy Shadows | 3 Shy Shadows |
| Gondola | 1 Pushy Shadow, 3 Shy Shadows | 1 Pushy Shadow, 3 Shy Shadows | 1 Pushy Shadow, 3 Shy Shadows |
| Water Tower | 1 Pushy Shadow | 1 Pushy Shadow | 1 Pushy Shadow |
| West Arena | 1 Pushy Shadow, 3 Shy Shadows | 1 Pushy Shadow, 3 Shy Shadows | 2 Pushy Shadows, 2 Shy Shadows |
| West Idol Stairs | 3 Shy Shadows | 3 Shy Shadows | 3 Shy Shadows |
| Altar Room | -- | -- | -- |
Notes and Additional Details:
- The data above is all based on in-game observation and has the potential to be falible.
Addendum (12/5/25): A recent push in debugging and datamining has allowed for more reliable information about enemy behavior in the PAL version. The chart has been updated according to information now available on the Team ICO Wiki. - Numbers shown do not reflect the total amount of Shadows you must defeat in an encounter. It only logs the arrangement of Shadows that can be present at one time.
Should a Shadow be defeated and a replacement emerge, the replacement always matches the behavior set of the fallen Shadow, keeping the arrangement static until the numbers are whittled down further. - The Shadows that emerge when yoruda is left behind (what I refer to as unscripted fights) are always Shy.
- Shadows that emerge from a group of Spiders can be either Shy or Pushy, depending on the form they've been programmed to take.
- In the game's earliest purchasable demo (packaged with Jampack Summer 2001), all Shadows were Pushy, and all Spiders were Shy. However, in every subsequent demo, all the enemies were made to be Shy.
Unseen Tears
The Shadows can be seen performing a motion that resembles wiping tears away from their face with their arms/wings. Though it hasn't been confirmed that this is the intent, it is difficult to interpret the motion as anything else. (Some have suggested it to be a dance, though, contextually, that doesn't add up. Especially, considering the fact that NTSC-U Shadows always wipe their face after they recover from being knocked down.) They can be seen wiping their faces in-between several actions, implying they are crying as they try to carry out their task.
They cry the most when surrounding Yorda's statue, seemingly devastated at their own success (Note: In the Japanese and PAL releases, you can only see them performing an extended face wiping animation in the sacrifice room before e-koʊ gets close to them). Under this reading, there's a strong implication that The Queen's magic forces them to do her bidding, even as they are aware of themselves and their own feelings.
Tradition
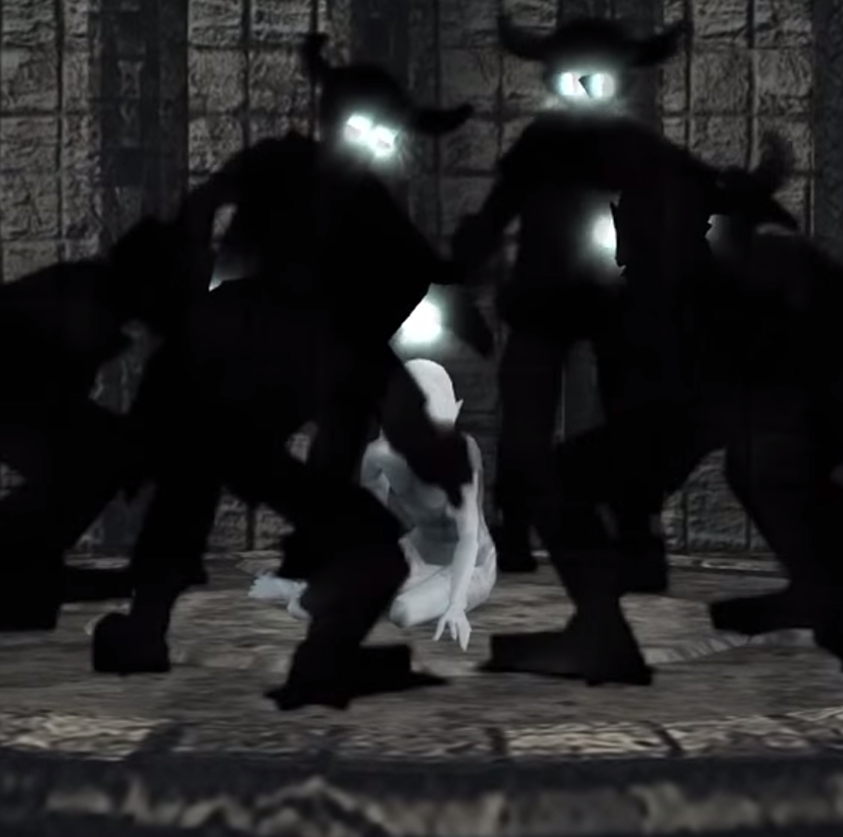
By the end of the game, it becomes clear that these Shadows are actually what remains of the sacrificed children.
Just before facing The Queen, e-koʊ finds a group of Shadows in disinctly humanoid forms, surrounding yorudas frozen stone statue. When he approaches, they stop wiping their eyes and turn to face his direction. When he moves even closer with his blade at the ready, they back away, fly, and scurry about, but no longer attack. They lack any objective, beyond watching e-koʊ and maintaining just enough distance to avoid his melee range.
They are aimless, curious, and afraid.
e-koʊ slashes through each new Shadow that appears, and when he does, they make noises that they haven't made in prior battles. The sounds are like distorted variants of e-koʊs own pain voicelines.
None of the new arrivals take on a monstrous form. They all appear as horned children with the same large metal cuffs that once locked e-koʊ into the stocks of his coffin. Each time they are destroyed by The Queen's Sword, their residual smoke flies into one of the coffins, and remains there while the runes glow. Trapped once again, they cannot respawn.
In total, there are 53 Shadows destroyed, and 53 coffins filled. e-koʊ was meant to be the 54th, and was the very last sacrifice needed to fill the hall, and presumably complete The Queen's ritual.
Trivia
- Shadows are vulnerable to tall bodies of water (typically knee-height). As soon as they step into it, their smoke-like bodies instantly dissipate.
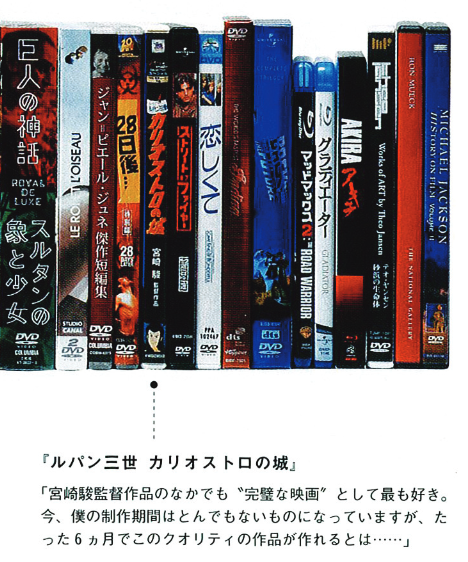
- Some of the Shadows' physical traits and movement, especially their hunched posture, resemble The Count's Assassins from the animated film, "Lupin the 3rd: The Castle of Cagliostro". In 2011, Fumito Ueda was quoted saying the film was his favorite among Hayao Miyazaki's works. It's not difficult to imagine this admiration for the film may have prompted a visual inspiration.
Credit to tropicalwave on Tumblr for these GIFs illustrating the movement.